How to make a professional blog
This post serves as a guide to creating a professional blog that can enhance your CV and showcase your skills. It covers the essential steps and considerations for building a blog that stands out in the cybersecurity field.
Why a Blog?
A blog can serve as a powerful tool for professionals in the cybersecurity field. It allows you to share your knowledge, document your learning journey, and demonstrate your expertise to potential employers. A well-maintained blog can also help you build a personal brand and connect with others in the industry.
Easiest Way to Start
The easiest way to start a blog is to use a platform like GitHub Pages or WordPress. These platforms provide user-friendly interfaces and templates that make it easy to create and manage your blog without needing extensive technical knowledge.
For this tutorial, I’ll focus on using GitHub Pages, as it’s a popular choice among developers and cybersecurity professionals. It allows you to host your blog for free and provides version control through Git.
Steps to Create a Blog on GitHub Pages
1. Create a GitHub Account
If you don’t already have a GitHub account, sign up for one at GitHub. This will be your central hub for managing your blog’s code and content.
Note: I strongly recommentd using a strong password, 2FA, and a password manager to keep your account secure. For Password manager, generate password and manage the 2FA tokens I recommentd using ProtonPass or Bitwarden.
2. Create a New Repository
I use the Chirpy theme, this is a simple and clean theme for Jekyll that is easy to customize. You can find the theme here.
If you want to use this theme, the easieest way to get started is to use the Chirpy Starter repository. This repository contains all the necessary files and configurations to get your blog up and running quickly.
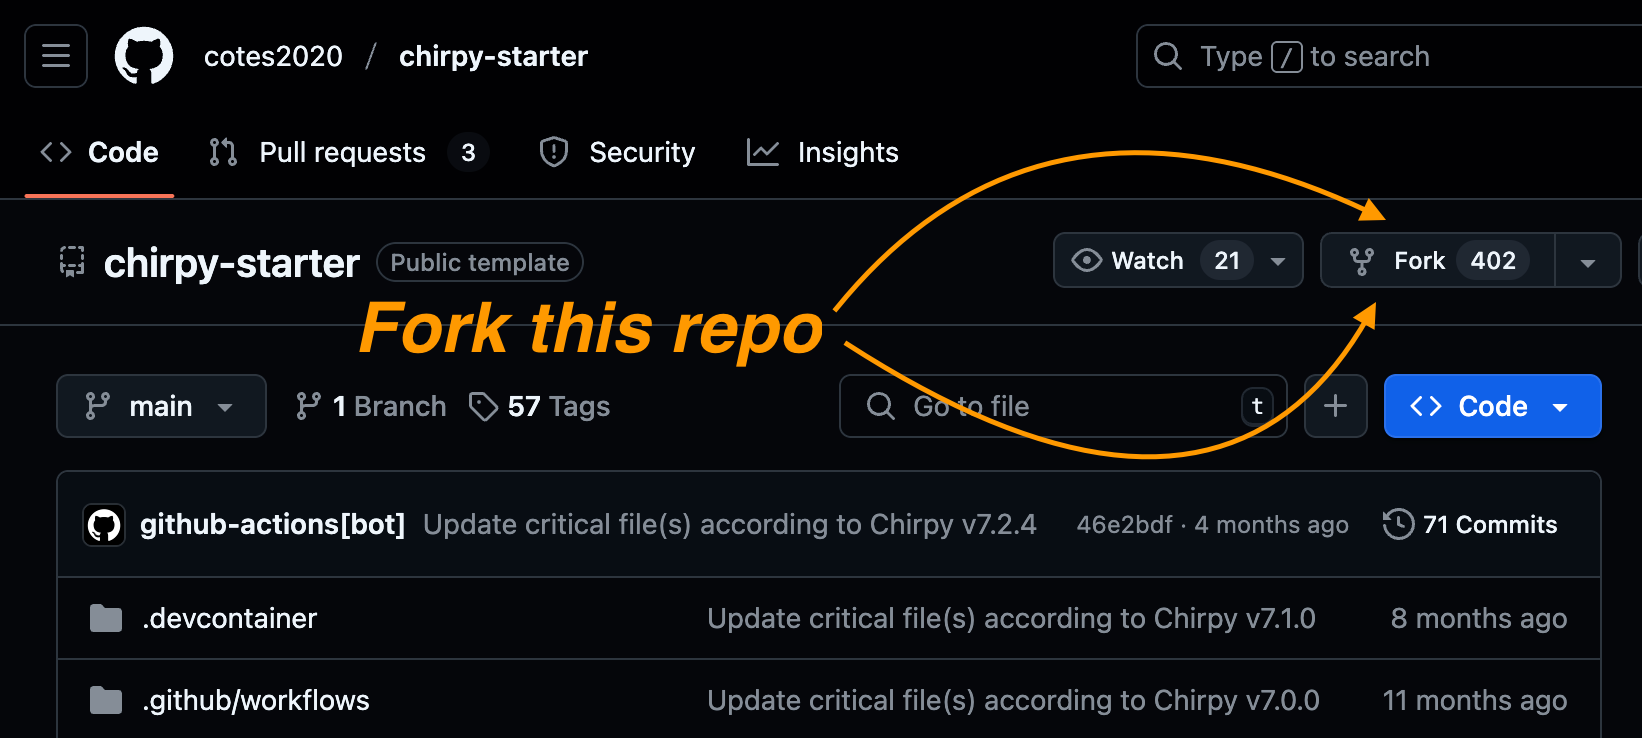 Fork Button
While you are forking the repository, you must choose the repository name in your profile, it’s required you set the repository name to username.github.io, where username is your GitHub username. This will allow GitHub Pages to recognize your repository as a personal website.
Example: if your GitHub username is
starscream, your repository name should bestarscream.github.io.Forking example
3. Clone the Repository
Once you’ve forked the repository, clone it to your local machine using Git. For this you have to install Git (if you haven’t already), If you don’t have experience with Git, you could use GitHub Desktop or GitKraken to manage your repositories, if you like use the terminal and you know what you are doing, you can use the terminal.
After you clone your repository, navigate to the directory where you cloned it. Now you can start customizing your blog, for this steaps you can use several editors, I will not recommend any specific editor, so if you don’t have a Unix-like Operative System, use dev containers or WSL to run a Linux environment, but if you are using a Unix-like OS, you can continue without any problem.
4. Installing dependencies
To start you must install the dependencies, for this you need to have Ruby and Bundler installed. If you don’t have them installed
1
2
3
4
5
6
7
8
9
10
11
12
13
14
15
# GNU/Linux RHEL base
sudo dnf install ruby ruby-devel gcc make
sudo gem install --no-document --user-install bundler
# GNU/Linux Debian base
sudo apt install ruby-full build-essential zlib1g-dev
sudo gem install --no-document --user-install bundler
# GNU/Linux Arch base
sudo pacman -S ruby
sudo gem install --no-document --user-install bundler
# MacOS
brew install ruby
sudo gem install --no-document --user-install bundler
# BSD
sudo pkg install ruby
sudo gem install --no-document --user-install bundler
Once you have Ruby and Bundler installed, in the root directory of your cloned repository, run the following command to install the required gems:
1
bash tools/init.sh
This command will configure the repository to be able to deploy on GitHub Pages.
Note: If you won’t made a deploy on GitHub Pages and you want to deploy on another server, you must add the
--no-ghoption to the command.
Create a start_jekyll.sh file in the root directory of your cloned repository, and add the following lines:
1
bundle exec jekyll serve --host 0.0.0.0 --port 8080 --baseurl ''
{: .nolineno }.
After initializing the repository, you can run the following command to install the required gems:
1
bundle install
This command will install all the required gems for the Chirpy theme and other dependencies.
5. Customize Your Blog
Now that you have your blog set up, it’s time to customize it. You can change the theme, layout, and content to suit your preferences. Here are some key areas to focus on:
- _config.yml: This file contains the main configuration for your blog. You can change the title, description, and other settings here.
- _posts/: This directory contains your blog posts. You can create new posts by adding Markdown files with the appropriate front matter.
- assets/: This directory contains your blog’s assets, such as images and stylesheets. You can customize the look and feel of your blog by modifying these files.
- _data/: This directory contains data files that can be used to store information for your blog. Here you must add the
authors.ymlfile and configure it with your information.
6. Preview Your Blog
To preview your blog locally, you can use the following command:
1
bundle exec jekyll s
This command will start a local server, and you can view your blog by navigating to http://localhost:4000 in your web browser.
7. Deploy Your Blog
Once you’re satisfied with your blog, it’s time to deploy it to GitHub Pages. You can do this by the following steps:
A. In the web page of your repository:
- Go to the
Settingstab. - Go down to the
GitHub Pagessection. - In the ‘Build and deployment’ section, select
GitHub Actionsas the source.
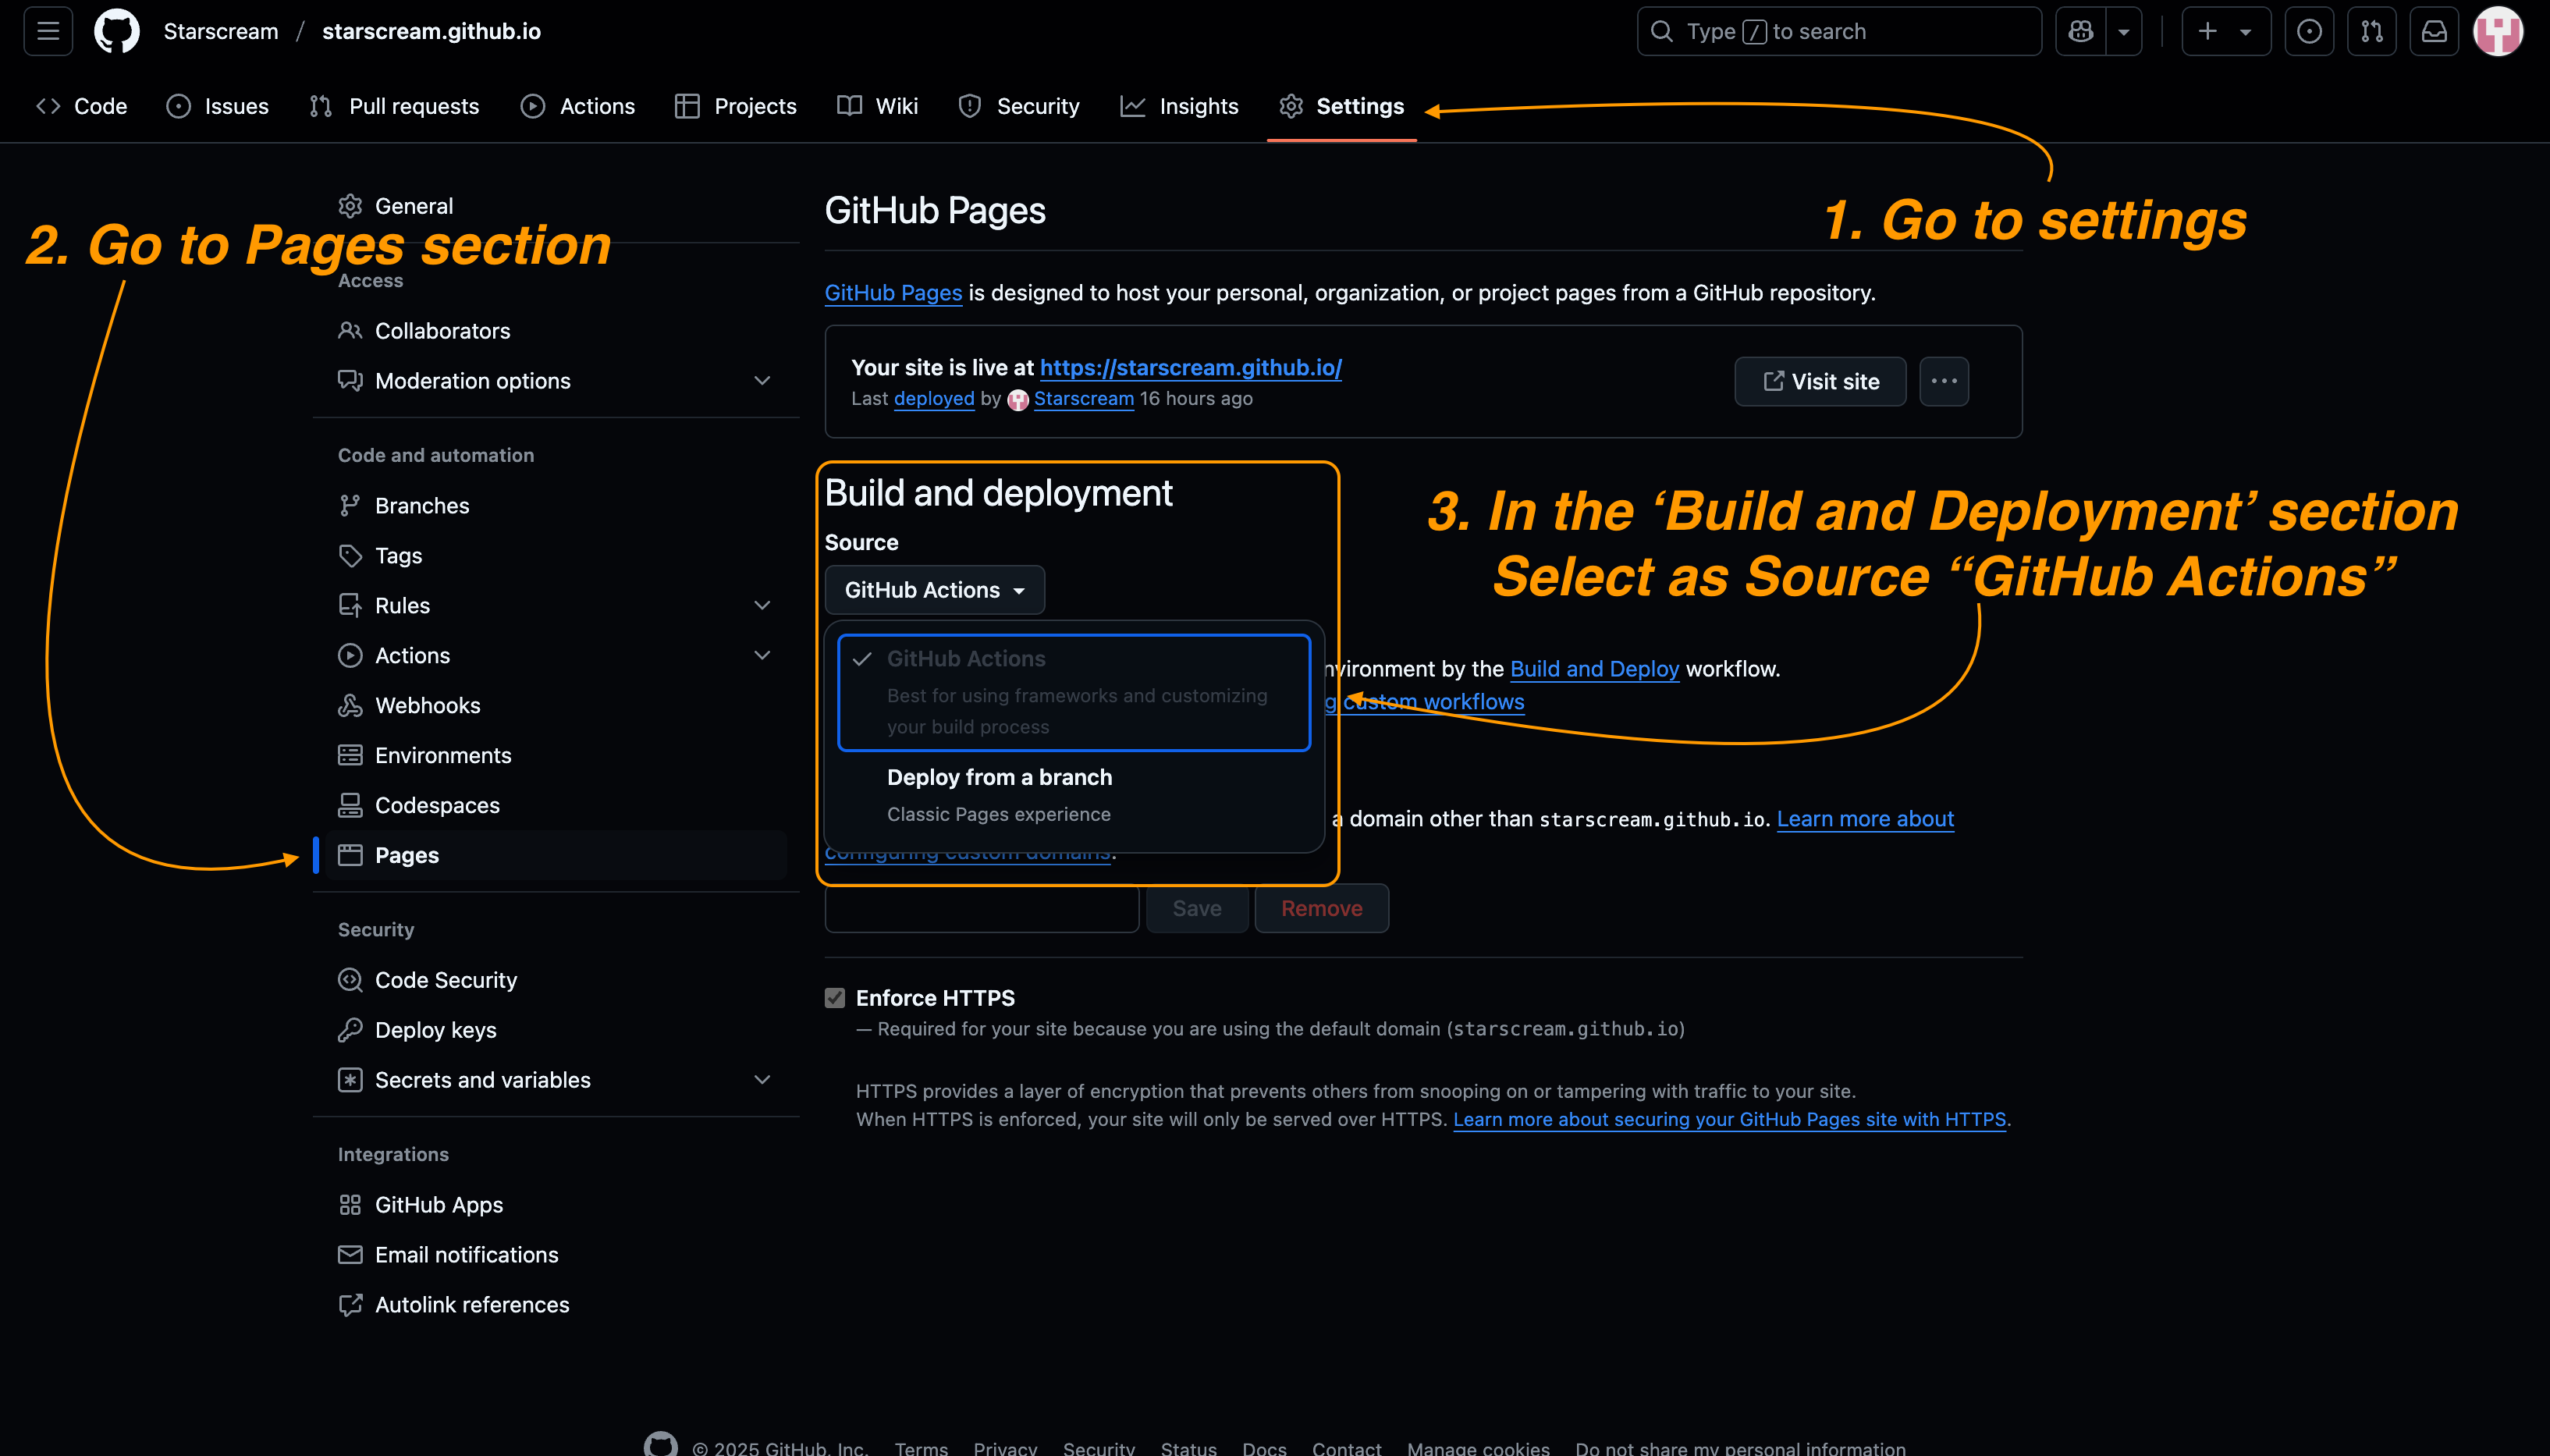 GitHub Pages settings
B. In the local repository: Stage all the changes and commit them to trigger the GitHub Actions workflow:
C. Checking Actions Workflow:
- Go to the
Actionstab in your repository. - Check the status of the workflow. If everything is set up correctly, the workflow should run successfully and deploy your blog to GitHub Pages.
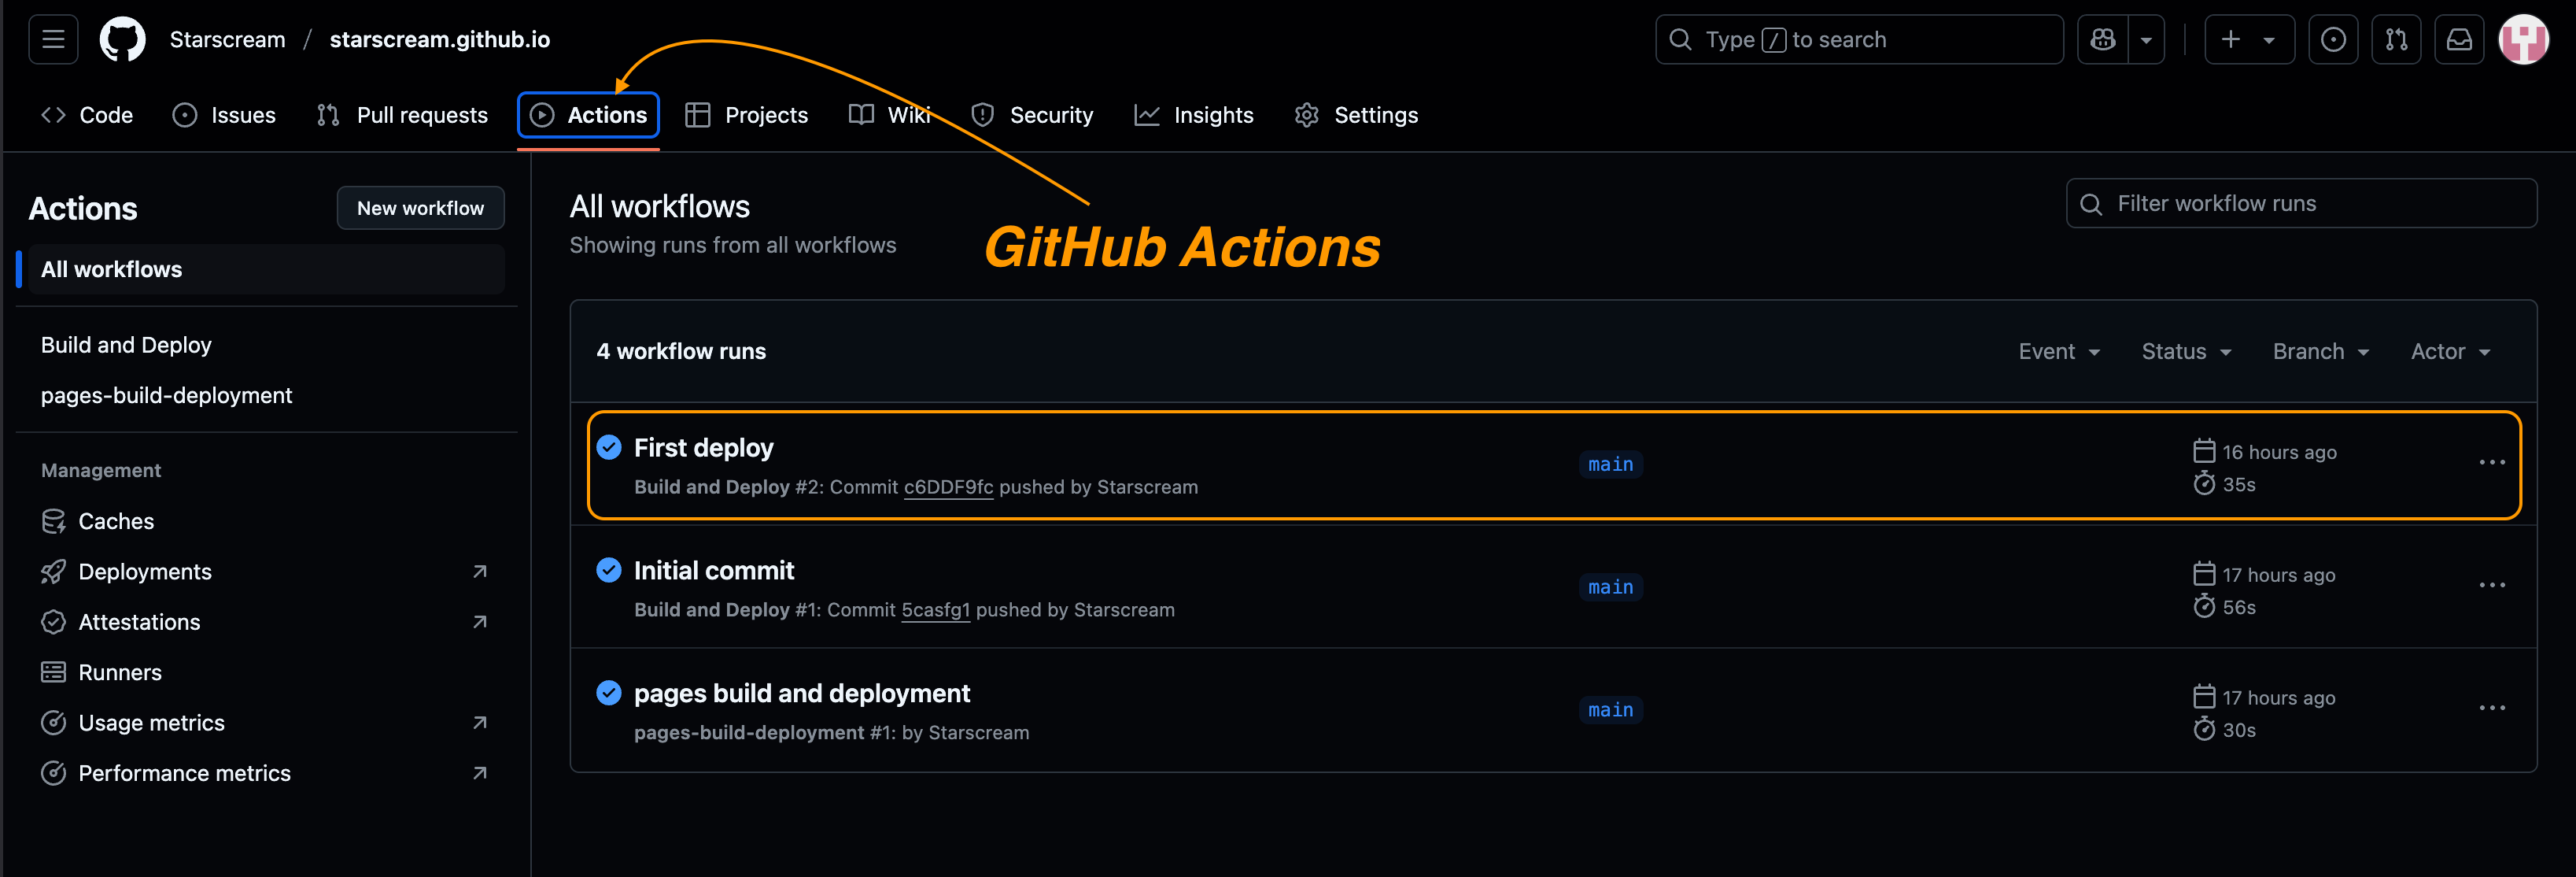 GitHub Actions workflow history
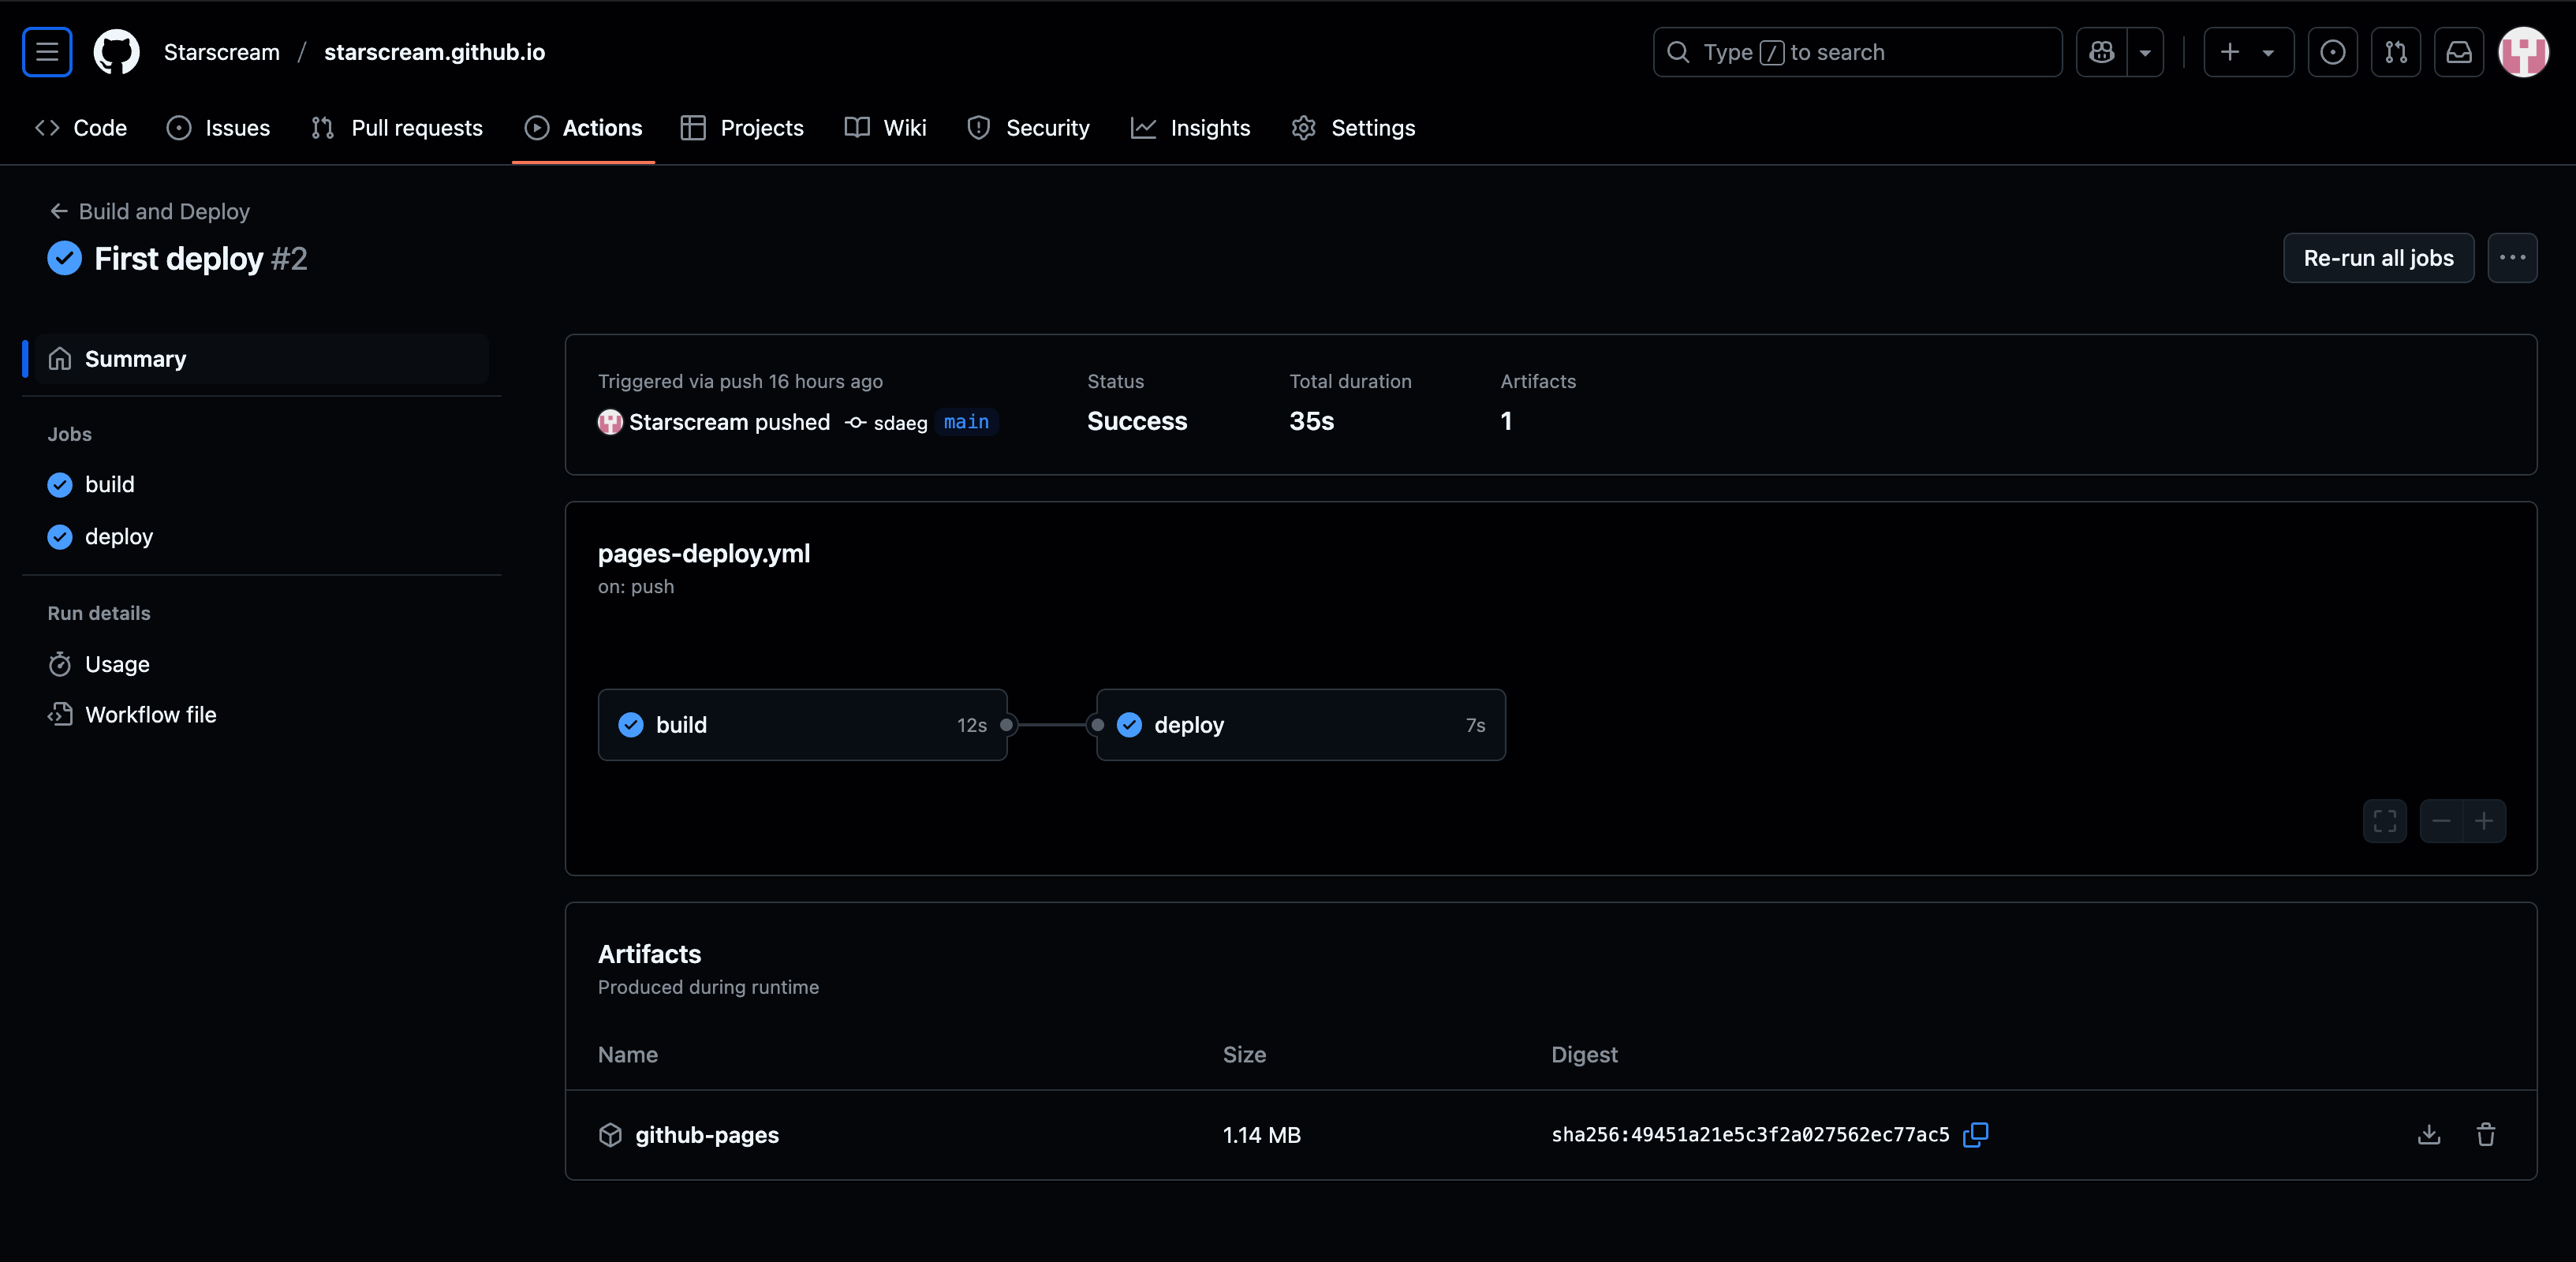 GitHub Action Deploy history
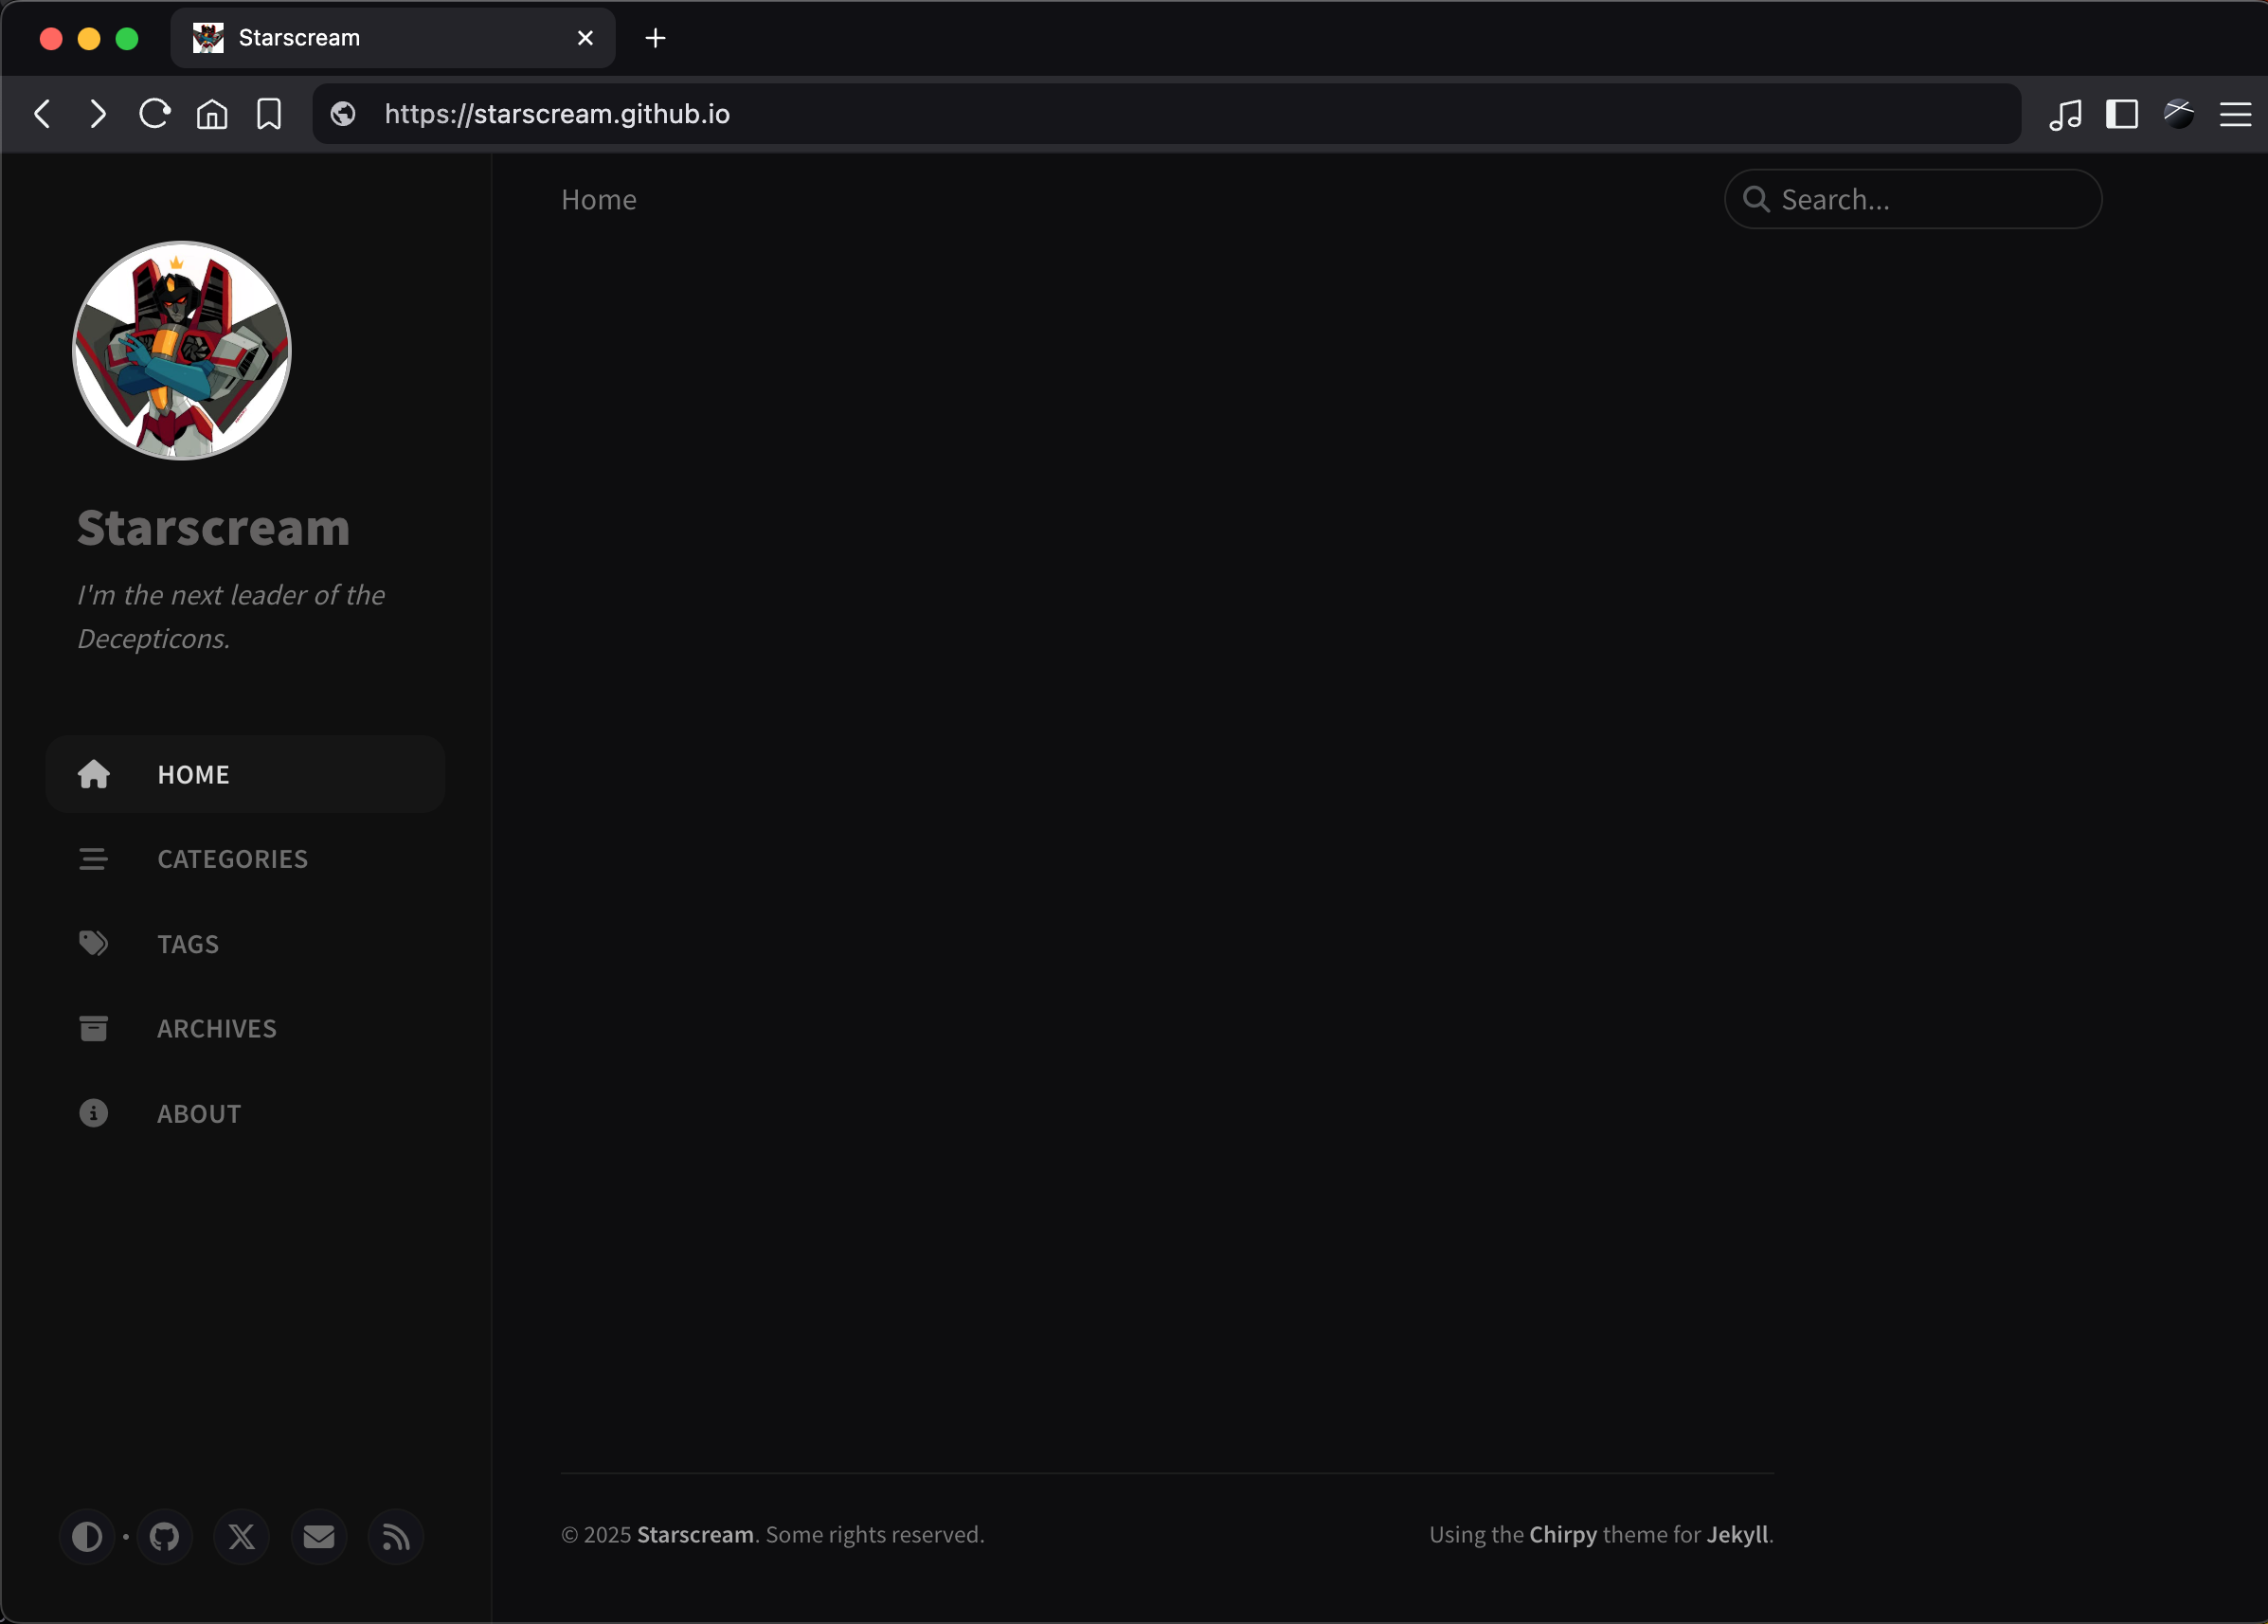 Blog online
8. Share Your Blog
Once your blog is live, share it with your network! You can add the link to your CV, LinkedIn profile, and other professional platforms. This will help you showcase your skills and knowledge to potential employers and collaborators.
9. Keep It Updated
A blog is a living document, and it’s important to keep it updated with fresh content. Regularly post new articles, tutorials, or insights related to cybersecurity. This will not only help you stay current in the field but also demonstrate your commitment to continuous learning and professional development.
Conclusion
Creating a professional blog can be a valuable asset in your cybersecurity career. By following the steps outlined in this guide, you can set up a blog that showcases your skills and knowledge. Remember to keep it updated and share it with your network to maximize its impact.